Make a Neato Ornament (or ten)
>> Tuesday, November 23, 2010
Welcome to everyone coming over here from the Whip-up post about making felt ornaments! If you tried clicking on the link to download the pattern earlier and got a message that traffic had killed it - that's been fixed now. Feel free to click away - and sorry about the delay.
I don't post much at this blog anymore, but you're welcome to join us at my Shiny Happy World for lots of sewing, embroidery and quilting patterns and tutorials. :-)
Yesterday I posted a link to a free stocking pattern (plus an absurd number of examples of what you can do with it). Today I bring you. . . . ornaments! You can download the free pattern here.
When I was a kid my sisters and I each got a new ornament every Christmas Eve. By the time I graduated from high school and moved out I had a fabulous collection of unique - and mostly handmade - ornaments. It's a great tradition and one I've been happy to carry on with Alan and Jo.
This year I designed a collection of ornaments inspired by vintage glass ornaments. You know the ones? Beautiful and oh-so-fragile. My collection is a whimsical interpretation of those traditional shapes and styles - made of felt and therefore safe from curious toddlers and climbing cats. Plus - they're easy enough for kids to make and the materials are inexpensive and easy to work with. Everyone wins!
So, do you like them? Do you want some for your very own? If so, here are your choices. . .
You can buy finished ornaments from me.
You can download the free pattern and make some yourself.
You can download the pattern and put your kids to work making these delightful ornaments for everyone you know.
The choice is yours. Ready for some inspiration?
My favorite shape is the ogee. Sometimes I embellish them with rickrack. . .
. . . sometimes with more felt and an embroidered asterisk for a little nod to mid-century mod.
I've also included two sizes of circles. You can embellish them with rickrack. . .
. . .or you can stack them and repeat that mod asterisk.
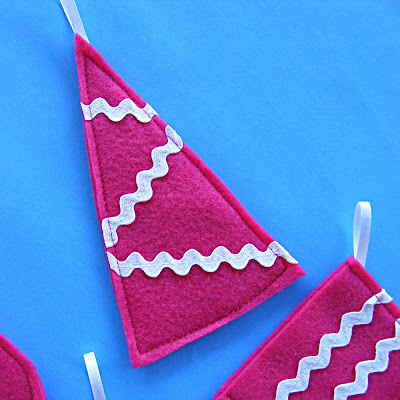
There's a little tree - it looks cute with some rick rack trim zig-zagged on there. I especially like this pink and white one - it reminds me of those pink aluminum trees. Remember them?
And then there's the stocking. A little mini-stocking that can hang on your tree AND hold a special little gift or bit of candy. Don't sew the top closed - then they'd be just stocking-shaped ornaments and that would be a sad waste of stockingness.
There's way more inspiration over at the Neato Ornament Group on Flickr. If you decide to make your own you should totally take pictures and show them off over there.
And here's a little sewing tip. If you're sewing rickrack (or any other ribbon-like trim) to an ornament, cut your rickrack longer than it needs to be. Sew it on with the ends hanging over the edges of your ornament. Trim it to fit after you're done sewing. Cutting it to fit and then sewing it on and trying to keep the edges lined up is a recipe for frustration and swearing.
So - a stocking pattern yesterday and an ornament pattern today. Tomorrow we'll put them together and it will be like peanut butter and chocolate - two great tastes that taste great together.
P.S. In 2011 I'll be launching the Shiny Happy Sewing School - offering weekly video tutorials for beginning sewists of all ages. Sign up for my newsletter or "like" Shiny Happy World on Facebook now so you don't miss a single thing! And if you know someone who wants to make "Learn to sew" one of their New Year's resolutions - please forward them the link. Thanks! And happy sewing!


3 comments:
Some gorgeous stuff.
It's incredibly funny how you can go through life for years and forget about the existence of rickrack -- and then go, "HEY! I remember that stuff!" It really makes those stockings, as do the buttons - they're awesome.
If I were going to make up new lyrics for My Favorite Things, rickrack would be at the top of the list.
hello, super beautiful stuff!!!!
can I ask the thickness of the felt used?
Post a Comment