Showing posts with label holidays. Show all posts
Happy Valentine's Day!
>> Monday, February 14, 2011
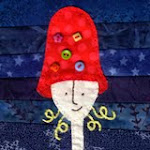
Jo saw me working on some little stitched girls for this Friday's pattern over on my Shiny Happy World. She decided that this girl was her favorite so I surprised her by stitching it up as a little felt pin. Easy peasy - and it's so much fun to embroider on felt. I need to do it more often.
Happy day! Read more...
Happy Thanksgiving!
>> Thursday, November 25, 2010
Happy Thanksgiving! We don't do a traditional dinner - instead we do a few favorites for everyone in the house - and who cares if together they make up a balanced meal. On the menu this year (in case you can't read our fancy-schmancy chalkboard or want links to recipes). . .
Peach Crisp
Chocolate Chip Cookies
Ice Cream Cones
Curried Butternut Squash Soup
Cheese Pizza
Ritz crackers with Boursin cheese and gruyere
Homemade Bread
Cornbread Dressing with Chestnuts and Sausage
I'll leave you to guess who requested what. :-)
Happy Thanksgiving everyone! Read more...
Peach Crisp
Chocolate Chip Cookies
Ice Cream Cones
Curried Butternut Squash Soup
Cheese Pizza
Ritz crackers with Boursin cheese and gruyere
Homemade Bread
Cornbread Dressing with Chestnuts and Sausage
I'll leave you to guess who requested what. :-)
Happy Thanksgiving everyone! Read more...
Meet the Anywhere Bear
>> Wednesday, November 24, 2010
Isn't he a cutie? The Anywhere Bear is a very versatile little pattern. I designed him to fit on my free Swell Stocking pattern - and that's what you see here.
But as I was working on the pattern I realized he could be used on lots of other things. Once you get the basic applique steps down you could add him to a pair of jeans, a handbag, a tote bag, a pillow - anywhere really. And he's not just limited to fabric uses either. I have a HUGE stack of paste paper that I've made at my job at Penland School of Crafts. And look what I did with some of it.
Instead of fabric I used my paste paper. Instead of embroidering the face I used a Sharpie. Instead of sewing him in place I glued him to the front of a card. Easy peasy and so much fun!
The pattern includes full-sized templates for the bear - sized to fit just right on the Swell Stocking or a regular-sized greeting card. There are also complete step by step instructions (with photos, natch) on how to applique the bear to fabric. There are even some notes and suggestions to help kids with the project.
Download the free Swell Stocking pattern here.
And the free Neato Ornaments pattern here.
And purchase the Anywhere Bear pattern ($5) here.
P.S. In 2011 I'll be launching the Shiny Happy Sewing School - offering weekly video tutorials for beginning sewists of all ages. Sign up for my newsletter or "like" Shiny Happy World on Facebook now so you don't miss a single thing! And if you know someone who wants to make "Learn to sew" one of their New Year's resolutions - please forward them the link. Thanks! And happy sewing! Read more...
But as I was working on the pattern I realized he could be used on lots of other things. Once you get the basic applique steps down you could add him to a pair of jeans, a handbag, a tote bag, a pillow - anywhere really. And he's not just limited to fabric uses either. I have a HUGE stack of paste paper that I've made at my job at Penland School of Crafts. And look what I did with some of it.
Instead of fabric I used my paste paper. Instead of embroidering the face I used a Sharpie. Instead of sewing him in place I glued him to the front of a card. Easy peasy and so much fun!
The pattern includes full-sized templates for the bear - sized to fit just right on the Swell Stocking or a regular-sized greeting card. There are also complete step by step instructions (with photos, natch) on how to applique the bear to fabric. There are even some notes and suggestions to help kids with the project.
Download the free Swell Stocking pattern here.
And the free Neato Ornaments pattern here.
And purchase the Anywhere Bear pattern ($5) here.
P.S. In 2011 I'll be launching the Shiny Happy Sewing School - offering weekly video tutorials for beginning sewists of all ages. Sign up for my newsletter or "like" Shiny Happy World on Facebook now so you don't miss a single thing! And if you know someone who wants to make "Learn to sew" one of their New Year's resolutions - please forward them the link. Thanks! And happy sewing! Read more...
Swell Stockings + Neato Ornaments = Easy Applique Designs
So on Monday I released the Swell Stocking pattern. And yesterday I shared some Neato Ornaments. Today I'm going to show you what happens when you put them together.
Let's start simple. Cut out an ogee shape, stitch on some rickrack and a button, stitch it to the stocking and - voila - you have a fancy ornament.
I cut out three felt trees and stitched them onto a stocking front. I added a scattering of buttons in lots of colors and sizes and - cute! - a forest of Christmas trees.
The stocking might be my favorite. I cut out one ornament-sized stocking, decorated it with a bit of rickrack, then stitched it onto the full-sized stocking leaving the top open so it acts like a pocket.
Jo went nuts when she saw me slip some lollipops into the stocking pocket for the photo shoot. "I thought that was just a decoration, but it's a pocket?! A pocket?! That is soooo cute!" Even Alan gave it props.
You can fit exactly five of the smaller ornament circles in a stack down the side of the stocking. I laid some ribbon down the center over the dots and stitched it down. The sides of the circles aren't attached and look pretty cool that way.
The smaller circles are also just the right size for these monster eyes. This guy makes me smile every time I see him.
I used the same circle template for these birds - made using designs from Ed Emberley's Picture Pie book.
Ed Emberley is a genius and everyone should have all of his books.
So there you have it. Swell Stockings + Neato Ornaments = a whole bunch of easy applique designs. Now go download them and have some fun! And if you want to just buy a finished stocking - you can find most of them (I'm still working on it) in my shop.
Psst! Come back later today and I'll introduce you to the Anywhere Bear - who can also be appliqued to a stocking! The fun never stops around here.
P.S. In 2011 I'll be launching the Shiny Happy Sewing School - offering weekly video tutorials for beginning sewists of all ages. Sign up for my newsletter or "like" Shiny Happy World on Facebook now so you don't miss a single thing! And if you know someone who wants to make "Learn to sew" one of their New Year's resolutions - please forward them the link. Thanks! And happy sewing! Read more...
Let's start simple. Cut out an ogee shape, stitch on some rickrack and a button, stitch it to the stocking and - voila - you have a fancy ornament.
I cut out three felt trees and stitched them onto a stocking front. I added a scattering of buttons in lots of colors and sizes and - cute! - a forest of Christmas trees.
The stocking might be my favorite. I cut out one ornament-sized stocking, decorated it with a bit of rickrack, then stitched it onto the full-sized stocking leaving the top open so it acts like a pocket.
Jo went nuts when she saw me slip some lollipops into the stocking pocket for the photo shoot. "I thought that was just a decoration, but it's a pocket?! A pocket?! That is soooo cute!" Even Alan gave it props.
You can fit exactly five of the smaller ornament circles in a stack down the side of the stocking. I laid some ribbon down the center over the dots and stitched it down. The sides of the circles aren't attached and look pretty cool that way.
The smaller circles are also just the right size for these monster eyes. This guy makes me smile every time I see him.
I used the same circle template for these birds - made using designs from Ed Emberley's Picture Pie book.
Ed Emberley is a genius and everyone should have all of his books.
So there you have it. Swell Stockings + Neato Ornaments = a whole bunch of easy applique designs. Now go download them and have some fun! And if you want to just buy a finished stocking - you can find most of them (I'm still working on it) in my shop.
Psst! Come back later today and I'll introduce you to the Anywhere Bear - who can also be appliqued to a stocking! The fun never stops around here.
P.S. In 2011 I'll be launching the Shiny Happy Sewing School - offering weekly video tutorials for beginning sewists of all ages. Sign up for my newsletter or "like" Shiny Happy World on Facebook now so you don't miss a single thing! And if you know someone who wants to make "Learn to sew" one of their New Year's resolutions - please forward them the link. Thanks! And happy sewing! Read more...
Make a Neato Ornament (or ten)
>> Tuesday, November 23, 2010
Welcome to everyone coming over here from the Whip-up post about making felt ornaments! If you tried clicking on the link to download the pattern earlier and got a message that traffic had killed it - that's been fixed now. Feel free to click away - and sorry about the delay.
I don't post much at this blog anymore, but you're welcome to join us at my Shiny Happy World for lots of sewing, embroidery and quilting patterns and tutorials. :-)
Yesterday I posted a link to a free stocking pattern (plus an absurd number of examples of what you can do with it). Today I bring you. . . . ornaments! You can download the free pattern here.
When I was a kid my sisters and I each got a new ornament every Christmas Eve. By the time I graduated from high school and moved out I had a fabulous collection of unique - and mostly handmade - ornaments. It's a great tradition and one I've been happy to carry on with Alan and Jo.
This year I designed a collection of ornaments inspired by vintage glass ornaments. You know the ones? Beautiful and oh-so-fragile. My collection is a whimsical interpretation of those traditional shapes and styles - made of felt and therefore safe from curious toddlers and climbing cats. Plus - they're easy enough for kids to make and the materials are inexpensive and easy to work with. Everyone wins!
So, do you like them? Do you want some for your very own? If so, here are your choices. . .
You can buy finished ornaments from me.
You can download the free pattern and make some yourself.
You can download the pattern and put your kids to work making these delightful ornaments for everyone you know.
The choice is yours. Ready for some inspiration?
My favorite shape is the ogee. Sometimes I embellish them with rickrack. . .
. . . sometimes with more felt and an embroidered asterisk for a little nod to mid-century mod.
I've also included two sizes of circles. You can embellish them with rickrack. . .
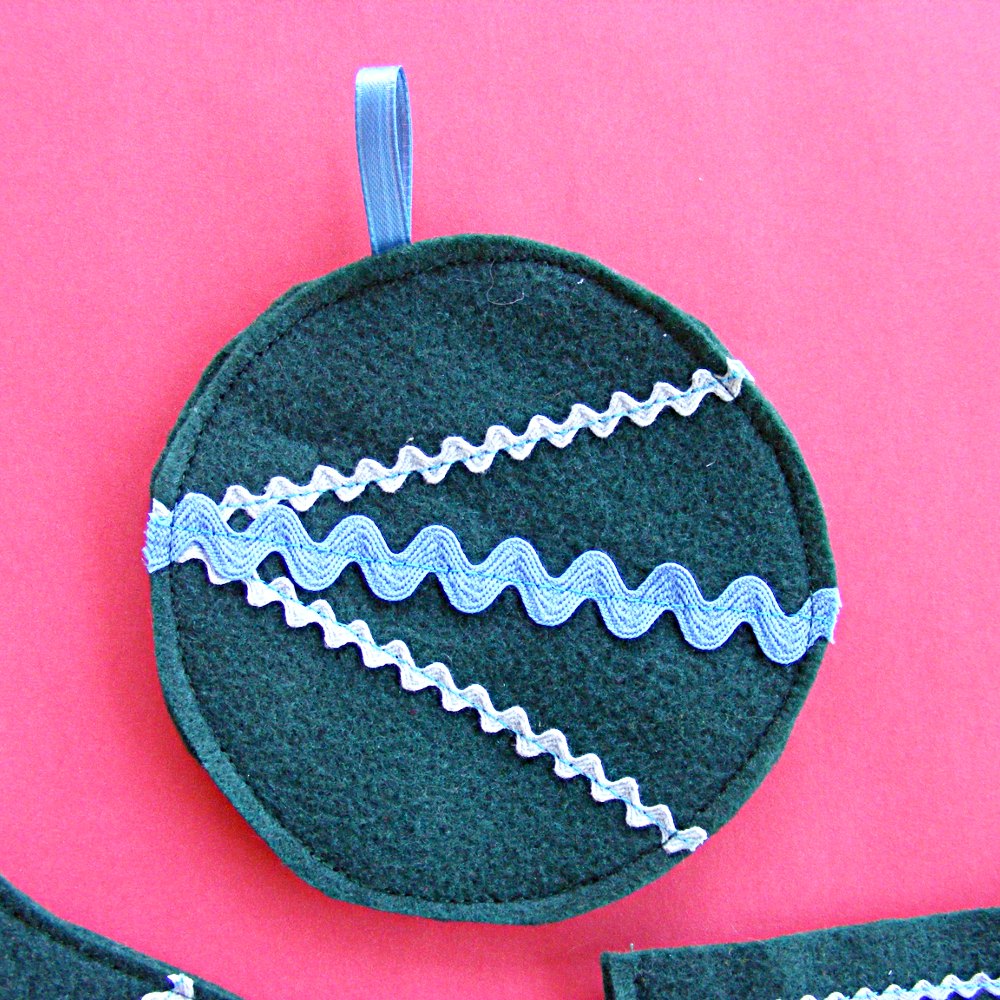
. . .or you can stack them and repeat that mod asterisk.
There's a little tree - it looks cute with some rick rack trim zig-zagged on there. I especially like this pink and white one - it reminds me of those pink aluminum trees. Remember them?
And then there's the stocking. A little mini-stocking that can hang on your tree AND hold a special little gift or bit of candy. Don't sew the top closed - then they'd be just stocking-shaped ornaments and that would be a sad waste of stockingness.
There's way more inspiration over at the Neato Ornament Group on Flickr. If you decide to make your own you should totally take pictures and show them off over there.
And here's a little sewing tip. If you're sewing rickrack (or any other ribbon-like trim) to an ornament, cut your rickrack longer than it needs to be. Sew it on with the ends hanging over the edges of your ornament. Trim it to fit after you're done sewing. Cutting it to fit and then sewing it on and trying to keep the edges lined up is a recipe for frustration and swearing.
So - a stocking pattern yesterday and an ornament pattern today. Tomorrow we'll put them together and it will be like peanut butter and chocolate - two great tastes that taste great together.
P.S. In 2011 I'll be launching the Shiny Happy Sewing School - offering weekly video tutorials for beginning sewists of all ages. Sign up for my newsletter or "like" Shiny Happy World on Facebook now so you don't miss a single thing! And if you know someone who wants to make "Learn to sew" one of their New Year's resolutions - please forward them the link. Thanks! And happy sewing! Read more...
How to Make a Swell Stocking
>> Monday, November 22, 2010
It's Thanksgiving week - are you ready for Christmas yet? Feeling crafty? Want to make something swell? Well I want you to make something swell - that's why I'm sharing this free pattern for a holiday stocking.
The pattern is just the basic template - the swellness comes in what you do with it. You can start simple with some rickrack or ribbon stitched across the top of the sock.
Easy peasy - and so cute!
Or you could get all daring and sew the trim on the other way - up and down. Oooh - creative!
Don't limit yourself to rickrack and ribbon. How about some fancy beaded trim?
Or a bit of a feather boa? Oooh la la!
Or maybe you want to go Raggedy Ann-style with some eyelet trim. The sky is the limit folks!
Do you have a bunch of buttons just hanging around in jars? I think they multiply when I'm not looking and I'm always looking for something to sew them to. You can add just a few buttons in a nice neat row. . .
. . . or a kajillion scattered over the stocking all willy-nilly.
Sometimes I like to sew on buttons with the knot and the tails visible on the finished piece. I'm a rebel.
I can hear you laughing now at how many stockings I made - but this is just the tip of the iceberg folks! Tomorrow I'm going to post a free ornament pattern - and show you how you can combine the ornament and stocking pattern to come up with all kinds of new stockings. You think I'm kidding? Take a look at this gallery of swell stocking inspiration for a little sneak peek.
Crazy, eh? And - it's a public group so after you make your own swell stockings you can post them in the same group for all the world to see and be inspired by. How's that for some holiday spirit?
Make sure you come back tomorrow!
P.S. In 2011 I'll be launching the Shiny Happy Sewing School - offering weekly video tutorials for beginning sewists of all ages. Sign up for my newsletter or "like" Shiny Happy World on Facebook now so you don't miss a single thing! And if you know someone who wants to make "Learn to sew" one of their New Year's resolutions - please forward them the link. Thanks! And happy sewing! Read more...
The pattern is just the basic template - the swellness comes in what you do with it. You can start simple with some rickrack or ribbon stitched across the top of the sock.
Easy peasy - and so cute!
Or you could get all daring and sew the trim on the other way - up and down. Oooh - creative!
Don't limit yourself to rickrack and ribbon. How about some fancy beaded trim?
Or a bit of a feather boa? Oooh la la!
Or maybe you want to go Raggedy Ann-style with some eyelet trim. The sky is the limit folks!
Do you have a bunch of buttons just hanging around in jars? I think they multiply when I'm not looking and I'm always looking for something to sew them to. You can add just a few buttons in a nice neat row. . .
. . . or a kajillion scattered over the stocking all willy-nilly.
Sometimes I like to sew on buttons with the knot and the tails visible on the finished piece. I'm a rebel.
I can hear you laughing now at how many stockings I made - but this is just the tip of the iceberg folks! Tomorrow I'm going to post a free ornament pattern - and show you how you can combine the ornament and stocking pattern to come up with all kinds of new stockings. You think I'm kidding? Take a look at this gallery of swell stocking inspiration for a little sneak peek.
Crazy, eh? And - it's a public group so after you make your own swell stockings you can post them in the same group for all the world to see and be inspired by. How's that for some holiday spirit?
Make sure you come back tomorrow!
P.S. In 2011 I'll be launching the Shiny Happy Sewing School - offering weekly video tutorials for beginning sewists of all ages. Sign up for my newsletter or "like" Shiny Happy World on Facebook now so you don't miss a single thing! And if you know someone who wants to make "Learn to sew" one of their New Year's resolutions - please forward them the link. Thanks! And happy sewing! Read more...
Happy Halloween!
>> Monday, November 1, 2010
We had a lovely Halloween here at Gratz Industries. Jo was torn between her Pokemon trainer costume and her Hogwarts Student costume. The weather decided for her and I think she looked terrific.
We decided to follow Neil Gaiman's lead and celebrate All Hallows Read by giving a scary book as a Halloween gift.
We did it up right with gift wrap and everything.
We got Jo a copy of Scary Stories to Tell in the Dark by Alvin Schwartz and illustrated by Brett Helquist. She DEVOURED it. That girl loves ghost stories - as long as they're not too scary - and this collection was just right. Now she's asking for the next two volumes in the series.
Hope ya'll had a great Halloween! And - just for fun - how awesome was the Halloween design on the Krispy Kreme box? We enjoyed far too many of these boxes this month. :-) Scary!
Read more...
We decided to follow Neil Gaiman's lead and celebrate All Hallows Read by giving a scary book as a Halloween gift.
We did it up right with gift wrap and everything.
We got Jo a copy of Scary Stories to Tell in the Dark by Alvin Schwartz and illustrated by Brett Helquist. She DEVOURED it. That girl loves ghost stories - as long as they're not too scary - and this collection was just right. Now she's asking for the next two volumes in the series.
Hope ya'll had a great Halloween! And - just for fun - how awesome was the Halloween design on the Krispy Kreme box? We enjoyed far too many of these boxes this month. :-) Scary!
Read more...
A Penland Fourth of July
>> Friday, July 9, 2010
Fourth of July celebrations at Penland School of Crafts are always a bit out of the ordinary, and this year was no exception.
The annual Penland Fourth of July parade began with the clay studio doing a rousing rendition of Stars and Stripes forever, mostly hummed, but with an accordion accompaniment.
The wood studio was up next, with a a high-flying tribute to their craft.
We particularly liked the bloody saw blade and severed finger, a badge of the wood studio if ever there was one. (The blade actually spun. That's what the strings are for.) Be careful there, guys!
A collection of Jo's friends get pulled along by Pablo, who's a world-class glass-blower. Jo usually finds a way into these kinds of floats, whether she was meant to be there or not, but this year seemed content to run around with the other kids on the sand volleyball court.
Our friends Michael and Stacey throw candy out to the crowd. Their costumes--they're s'mores--were designed and created by their daughters Lillian and Evelyn, who are down there somewhere. We never do get there early enough to get a front row seat.
The encaustic class. Not sure what that means, exactly, but I think it's a way of working with metals. (Wendi will have to chime in here.) Theirs had something to do with bees, or getting buzzed. Wendi chiming in here - encaustics is painting with melted wax that has pigment in it - it's a lovely texture and the studio smells fantastic with all that melted beeswax.
A sort of patriotic drag queen group...
And this was my favorite--a map of the United States made out of 25,000 bottle rockets! The creators took chicken wire and stretched it on a frame, then slid the bottle rockets stick-first into it. (See the red color beneath the blue? Click on the image to see it larger.) And of course, later that night they lit it up! After the big BIG fireworks display, they tossed their creation onto the bonfire, and it went crazy. Awesome.
Best presentation of the night went, as it almost always does, to the glass studio. Last year, they popped out of a van and pretended to blow glass using a watermelon on the end of a metal tube. This year, they created a fire-breathing dragon using some of the propane they use to do smaller work outside the ovens. Then they worshiped the dragon with balloons on the ends of their blowing sticks where the glass would normally be. He breathed fire, snorted smoke bombs, and then popped all the helium in their balloons with mini-explosions! Nice stuff.
After the parade ended, we all settled in for nightfall to watch the big fireworks display. Another fun, creative year of Fourth of July celebrations with our friends at Penland. Yay for America! Read more...
Labels:
Alan,
costuming,
holidays,
Rural Living
Growing Crystals in Eggs - Baking Soda is the Winner!
>> Saturday, April 17, 2010
Shortly before Easter Jo and I did a science experiment about growing crystals. Instead of the same old-same old rock candy experiment, we grew all different kinds of crystals in eggshells. You can see the link to the tutorial and the before pics in the previous post, but I thought I'd show some afters now that the water is all evaporated.
The most boring were the granulated sugar
and table salt.
They just kind of hardened into one big chunk at the bottom of their shells. These might have been better if I had seeded the solution with some starter crystals - I don't know. But the others were pretty fabulous. Check out the gorgeous cubes of kosher salt.
And the smaller cubes of the ice melt. Some of the ice melt solution seeped out through hairline cracks in the shell and grew crystals on the outside too. Cool!
The powdered sugar made an even coating of small crystals.
But the hands-down winner was the baking soda solution.
The first picture in the post was also the baking soda egg. The solution seeped through cracks to form crystals on the outside of the shell (like the ice melt) but it also wicked up through the egg shell to form crystals on the entire cracked edge. And the inside of the shell was coated with teeny-tiny little crystals. So pretty.
The eggs are pretty and all - but as Jo and I examined the eggs, took pictures, and compared the final results to Jo's predictions, Jo said, "You know what I think happened? I think all the water we added the the crystals evaporated away and it left just the crystals behind." Which led to a talk about how to get salt from ocean water, the salt caverns near Krakow, and the expression "earning your salt." We even took a salt quiz. Good geeky fun. :-) Read more...
The most boring were the granulated sugar
and table salt.
They just kind of hardened into one big chunk at the bottom of their shells. These might have been better if I had seeded the solution with some starter crystals - I don't know. But the others were pretty fabulous. Check out the gorgeous cubes of kosher salt.
And the smaller cubes of the ice melt. Some of the ice melt solution seeped out through hairline cracks in the shell and grew crystals on the outside too. Cool!
The powdered sugar made an even coating of small crystals.
But the hands-down winner was the baking soda solution.
The first picture in the post was also the baking soda egg. The solution seeped through cracks to form crystals on the outside of the shell (like the ice melt) but it also wicked up through the egg shell to form crystals on the entire cracked edge. And the inside of the shell was coated with teeny-tiny little crystals. So pretty.
The eggs are pretty and all - but as Jo and I examined the eggs, took pictures, and compared the final results to Jo's predictions, Jo said, "You know what I think happened? I think all the water we added the the crystals evaporated away and it left just the crystals behind." Which led to a talk about how to get salt from ocean water, the salt caverns near Krakow, and the expression "earning your salt." We even took a salt quiz. Good geeky fun. :-) Read more...
Subscribe to:
Posts (Atom)